Summary
In this blog post, we will show you how to create your first campaign. At the end of this lesson, you will understand the general function of each element and when to use them. You will also learn about the basic concept and ideology behind the different elements around Vocads’ no code editor.
Introduction
Hello Vocadians! In this session, we will create our first campaign, how exciting!
When creating a campaign, it’s essential to think about the type of audience it is addressing in order to tailor it to their needs and expectations. Many factors can be considered here: the more you know about your user, the better.
In this tutorial, we will create a demonstration campaign for a website selling online tips and courses on photography, post-production, and more. The purpose of this campaign is to redirect users to the company’s Facebook community as well as the courses they are offering.
First steps
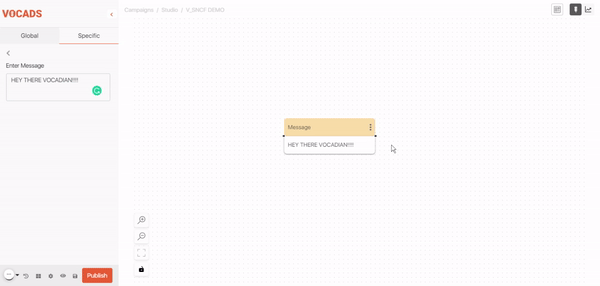
A welcome message is always a good idea to open the conversation with the users, let’s use the message element to set it up. To do so, we simply drag a message element from the library to our canvas. We can start with a greeting or any other kind of message you like, unleash your creativity!
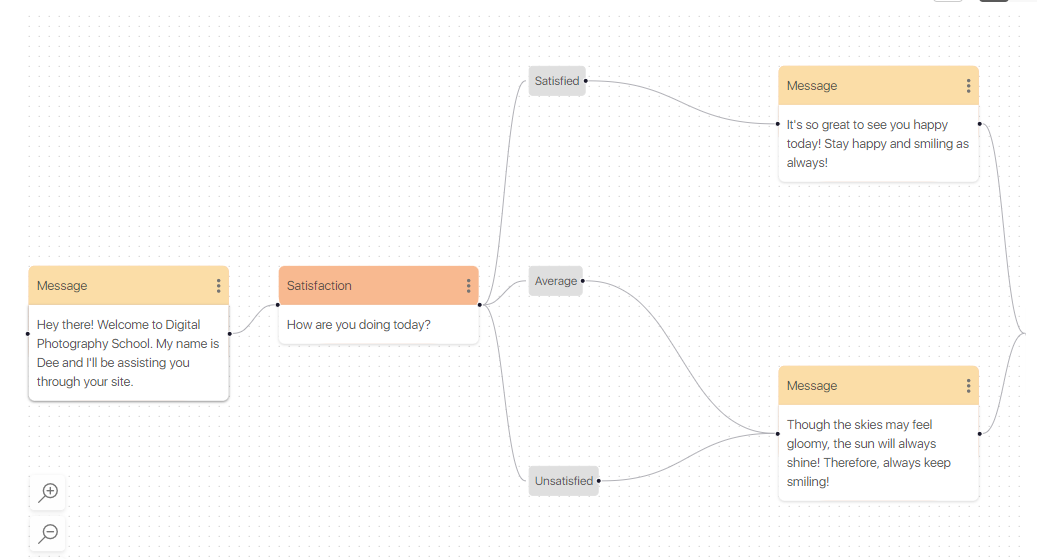
Our next step will be to ask the user how they are doing, the perfect tool for this is the Satisfaction element. As the name suggests, the Satisfaction element is a very powerful block that recognizes how satisfied the user is. It also works to know whether they’re in a good mood or not. We add in nice and comforting messages for the user if they are having a good or a bad day. Personalizing a campaign really makes it more lively and takes user experience to the next level!
When you add an element, you will see a dot on each side of it. Click on one of these dots and drag to another element to connect them together.
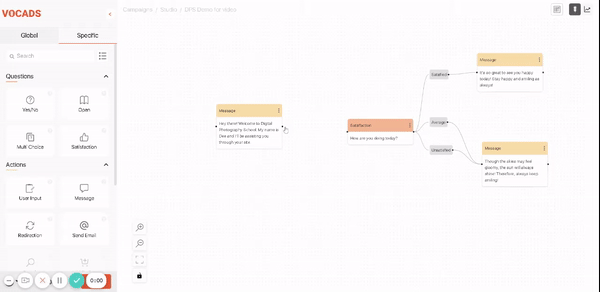
In the satisfaction element, we can find an option called “Satisfaction Bifurcation,” which creates different flows based on the user’s level of satisfaction. For each branch, we can create and connect a personalized message element based on the user’s mood. Here are the items we can think of for our satisfaction element. The choice is yours whether to keep a similar message for the average and the unsatisfied extension groups or not.
We will stop here for the introduction but one could imagine doing more thanks to the endless possibilities of Vocads. the sky’s the limit here!
Guidance and goals
When a website is accessed by a user, they might see the homepage with information about offers, company news and more. As a result, the user is unsure where to access what and more. Using UNI can really simplify navigation on a site.
Each page on a website should have a specific function, and have a particular goal. UNI smoothly guides the user towards this goal through a natural conversation.
The first thing we can do is to create a small flow that describes the company and what it offers using message elements. Let’s include this in our campaign!
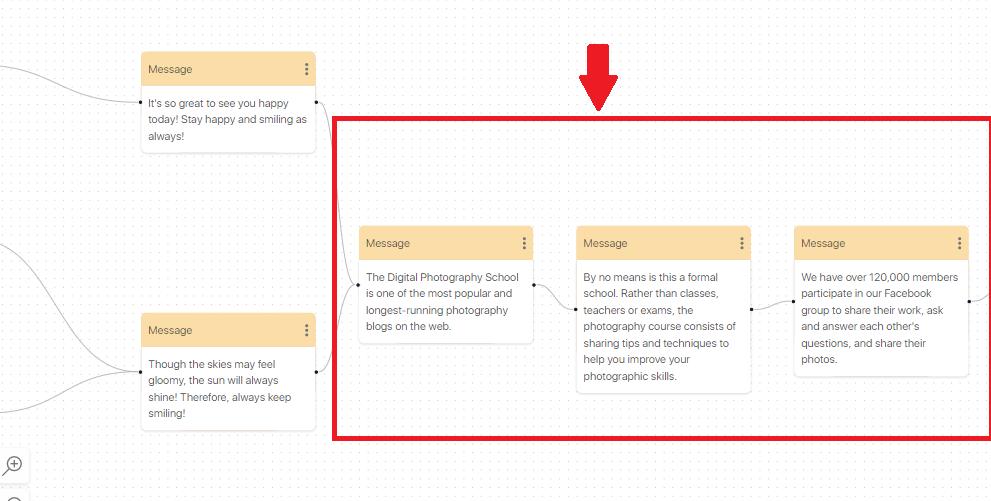
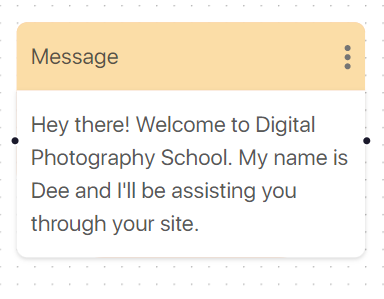
In our first message element, we present what the photography school does. Second, we show what sets them apart from other schools. We finally introduce the group that the school provides to help students and fellow photographers connect with each other.
The goal of this campaign is to turn leads into clients or, in general, to become a member of the community. Using the Multi Choice element, we ask the user whether they want to become a part of the community or explore and learn more about the company.
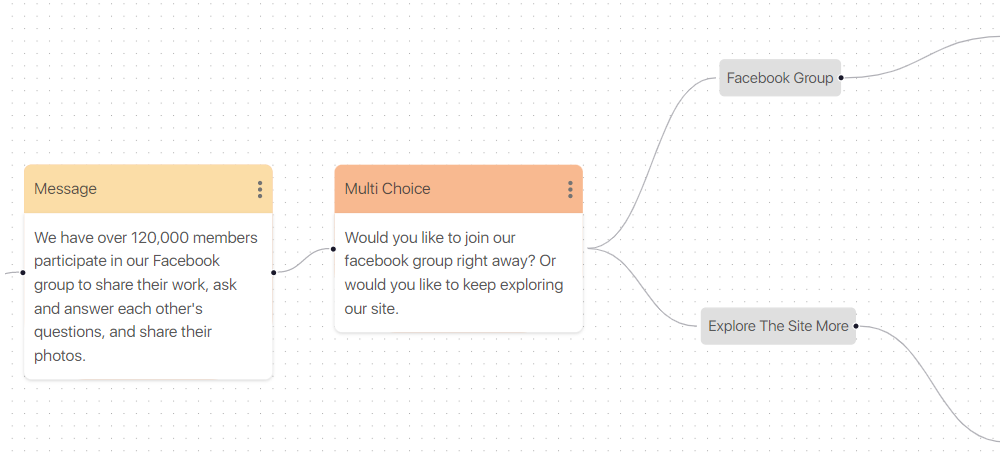
The Multi Choice element implements exactly what you think it does: multi-choice questions! Using this element lets us create a number of options for websites with a high number of pages. The photography school’s website is pretty small, so we create only two options. If the user decides to join the community, we can redirect the user to the community page using the redirection element.
If the user decides to explore the website more, we let them choose what they want to learn more about using yet another Multi Choice. In our case, we use two extensions to redirect the user to different pages of the website.
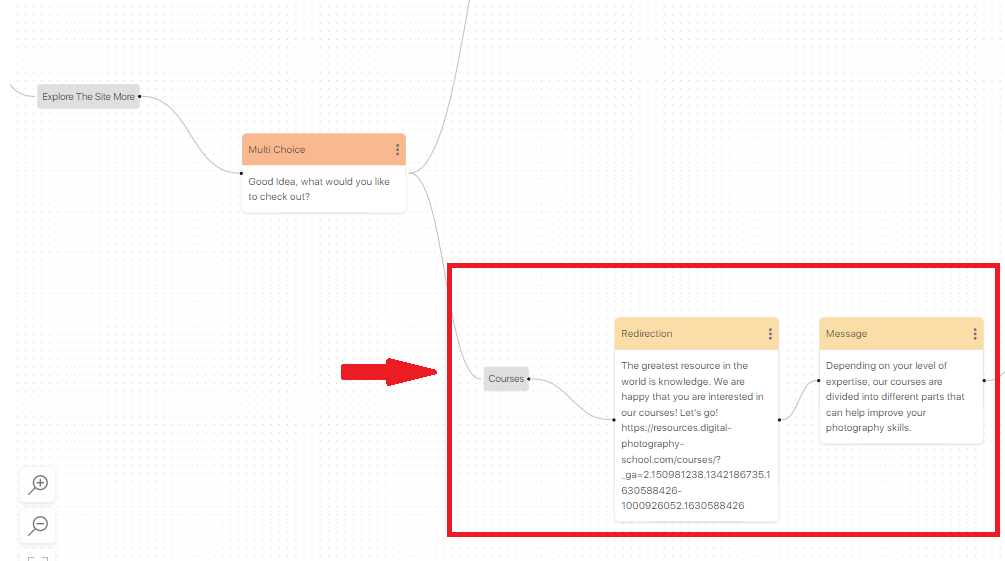
We have created two choices in the Multi Choice element: one directs the user to the school’s blog about photography tips, and the other takes them to the photography courses. Let’s now examine in detail the courses section of the Multi Choice block.
The course path is important to convert leads into customers, it plays a crucial role in prospect conversion.
We have just seen how you can create paths and flows that guide users through the website and the sales process from start to finish to improve your conversion rate.
Redirection: switching between pages
Whenever a user enters a new page on a website, it is always wise to give them a little overview of the page to help them understand what’s going on. Therefore, we create a message element connecting the redirection element for the user to better understand the page they land on.
If a message is very long, split it into several smaller parts, it will sound way more natural.
After the little tour, the user is be provided with different options of courses
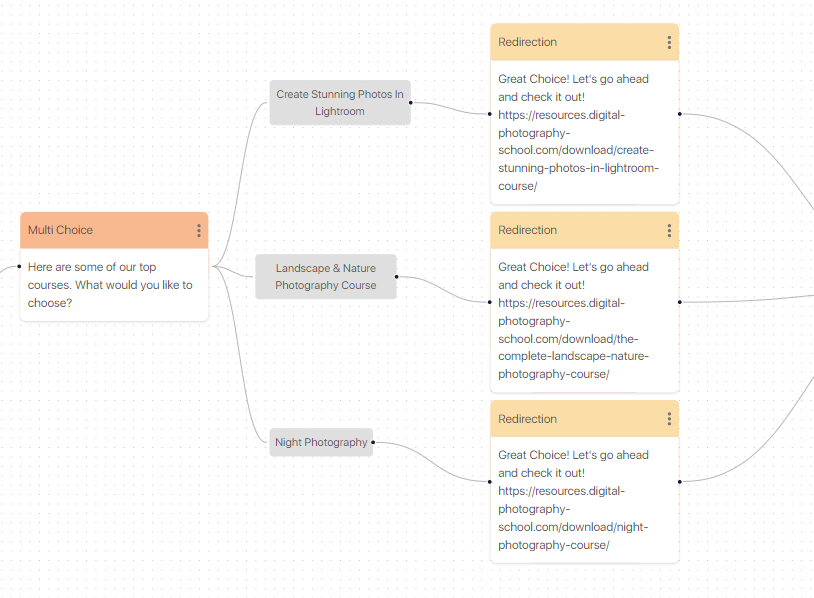
Using the Multi Choice element, we created three options based on the best selling courses. Each option links to its own Redirection element, redirecting the user to the desired page.
Ending a campaign
In order to end the campaign on a positive note, we can add a review block for the user to share their opinions. Let’s use the yes/no element to create a prompt for a feedback session in our campaign. We then connect the extension of the yes/no element to a “send email” element
The Satisfaction element could also be used here and would provide a more granular answer.
The “send email” element sends a personalized message to the user’s email address. Using both yes/no and sending an email lets us create a simple feedback flow at the end of our campaign
In accordance with the user’s response, the send email element sends a custom-made email to an email ID. We can use both yes/no and sending an email in our campaign to create a simple feedback flow.
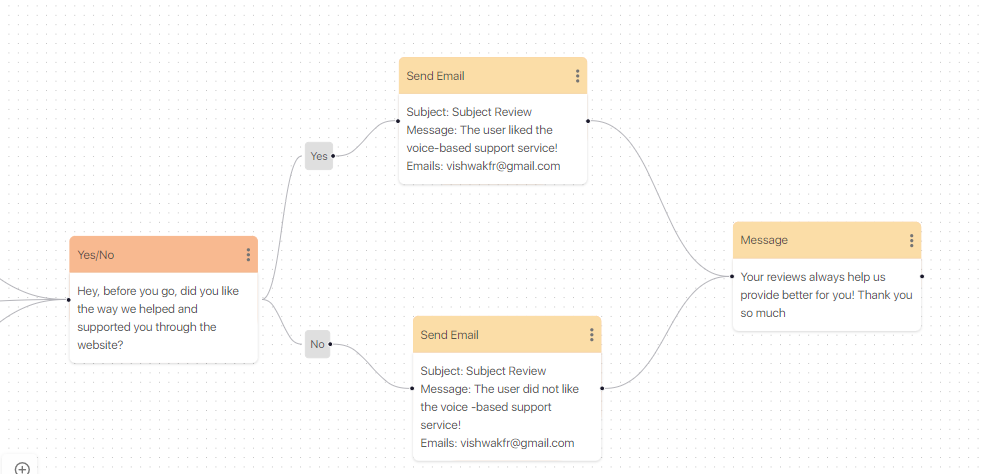
A message thanking the user for the feedback is always welcome at the end of a campaign. Think of conversations: it’s always appreciated to say hello and goodbye, and it’s the same here. An email with customized content will be sent to the email address listed in the send email element for you at the end of the campaign when the user submits a good review or feedback.
And there you have it! Our first campaign has been created, Congratulations!!
Please watch the video below If you’re looking for a more detailed video based tutorial on creating your first campaign!
Good luck out there, Vocadians! We look forward to seeing your campaigns take your website to the next level! Send us your work so we can share it with the community!